Cleaning your Photoshop File for Submitting

Requirements: Adobe Photoshop

Difficulty: Medium

Time: 20 Minutes
Step 1.
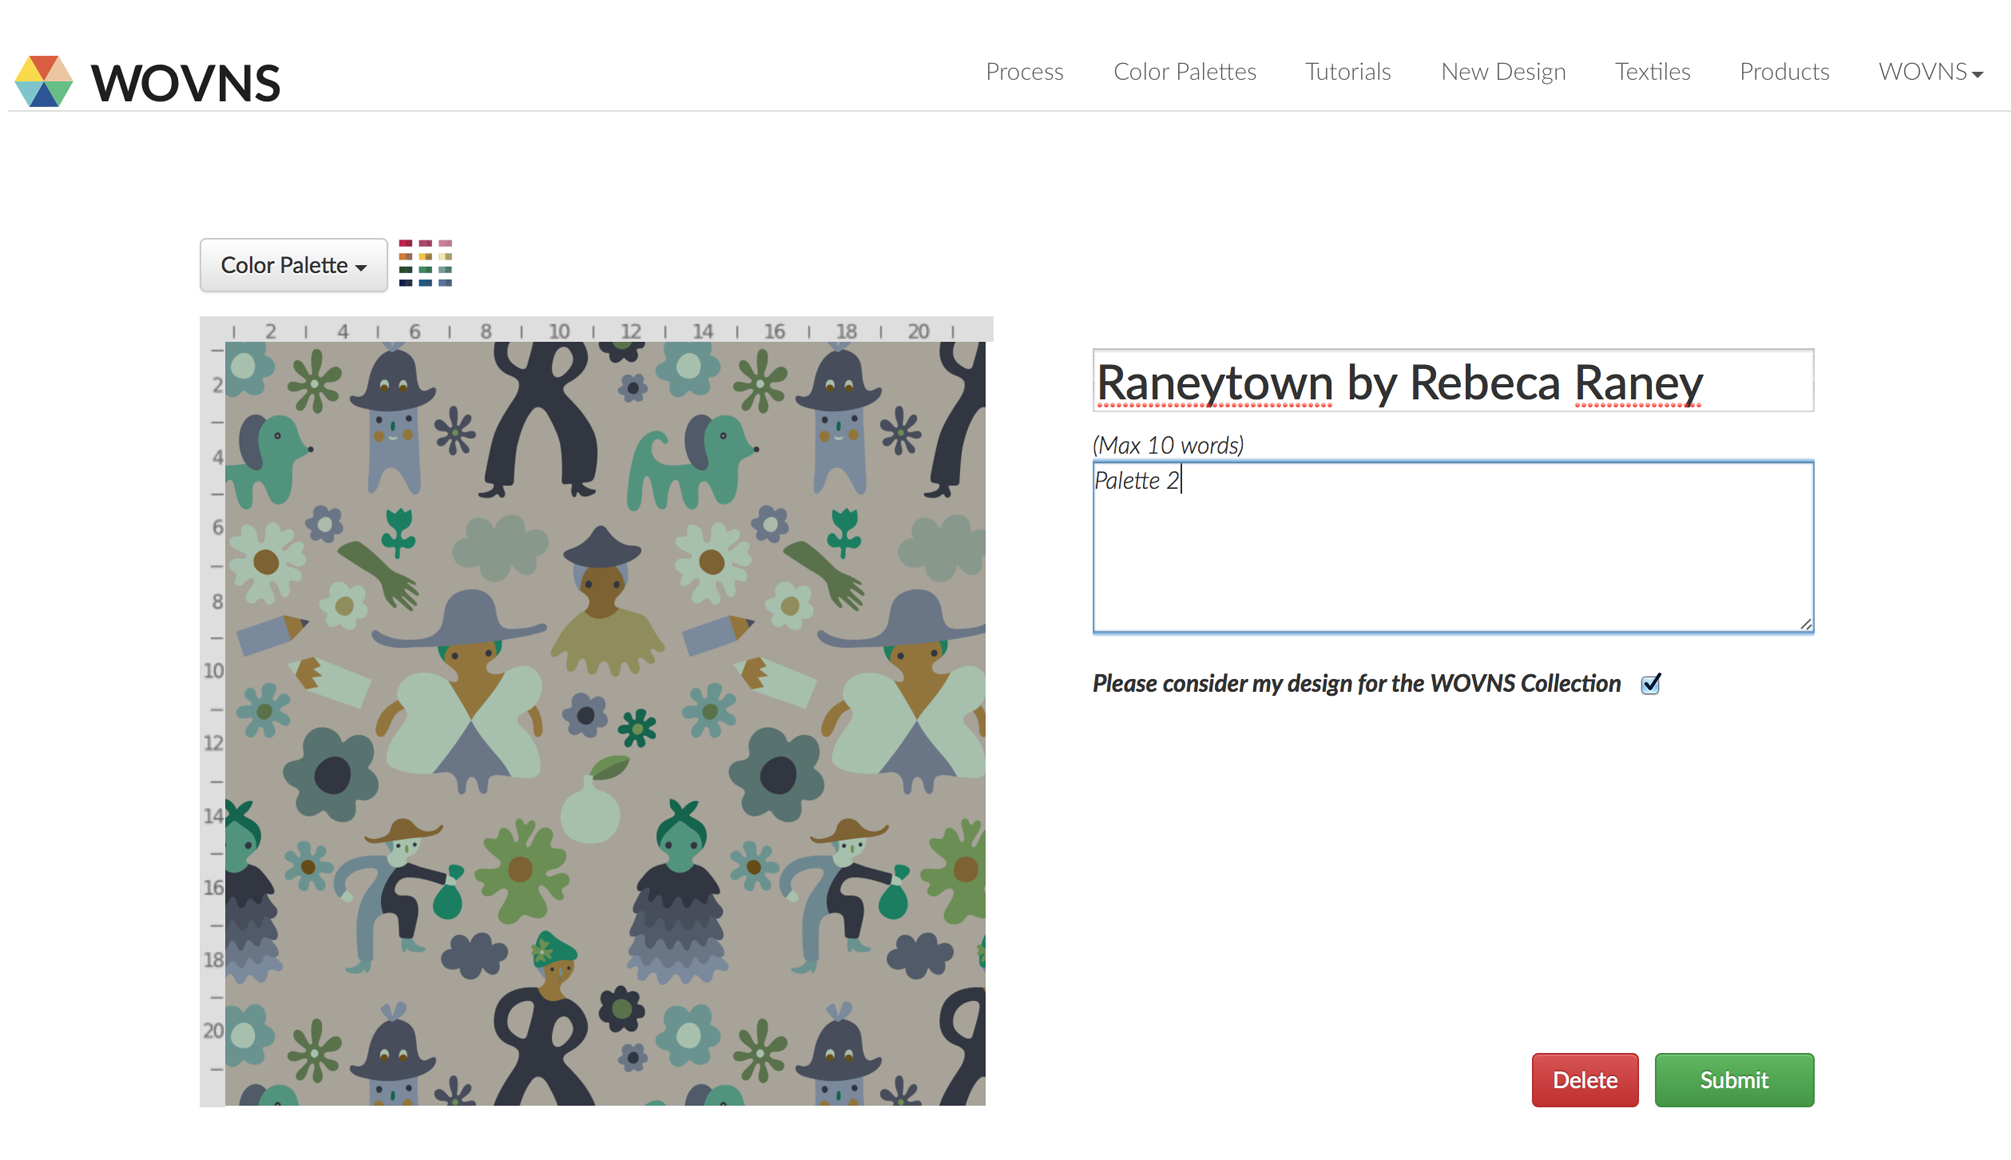
If you are ready to clean your Photoshop artwork file, your Photoshop design file should already be colored
with a WOVNS Color Palette, color mode should be Indexed (see the Designing with WOVNS Color Palettes
tutorial) and the artwork file should be the correct size for your fabric quality.
Step 2.
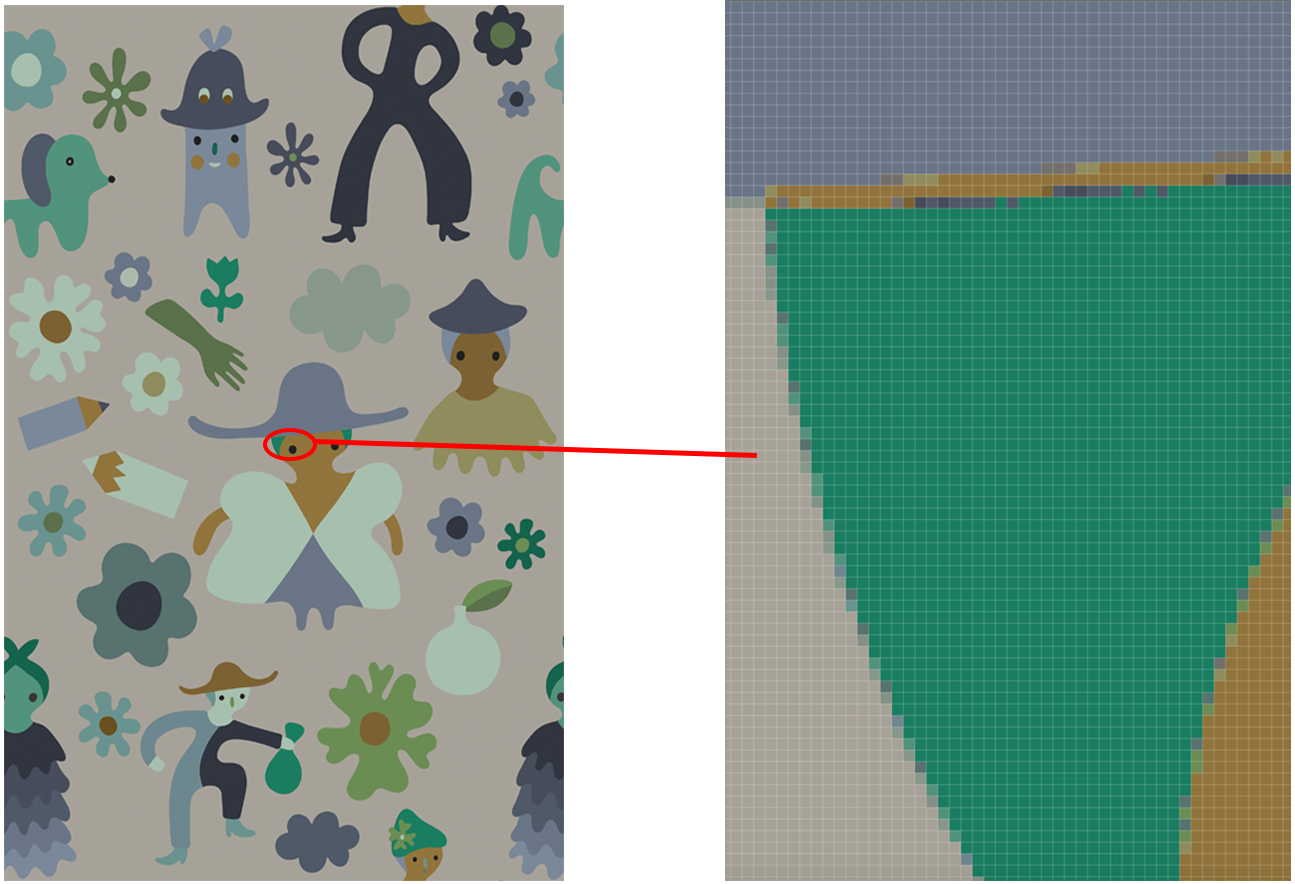
The last step before uploading your file to the WOVNS platform is to clean any unwanted pixelation, because pixelation can jeopardize the quality of your final woven product. Zoom into your design 1200-3200%.
Step 3.
There are several different approaches to cleaning a design, all of which require judgement and practice.
You can use Photoshop tools to delete stray pixel areas and smooth out curves. Keep in mind that you may have to adjust some pixels individually.
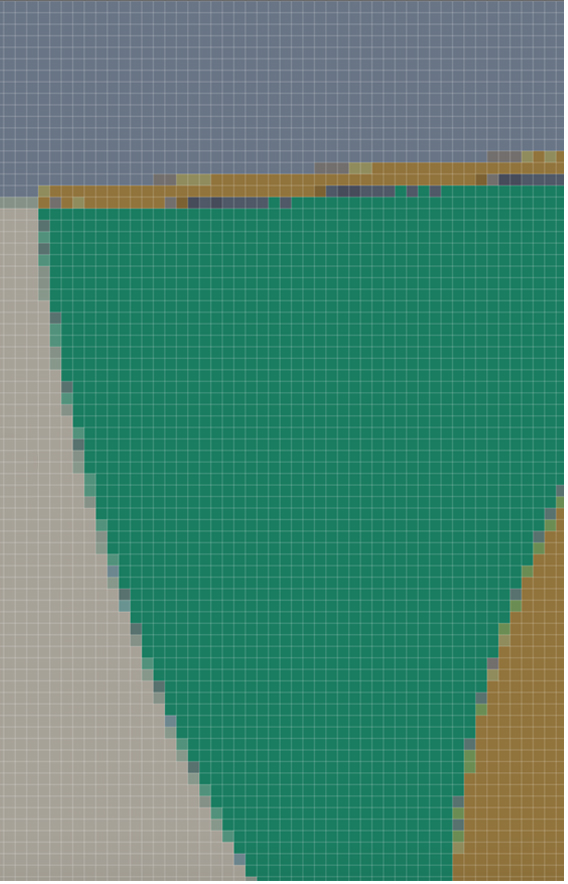
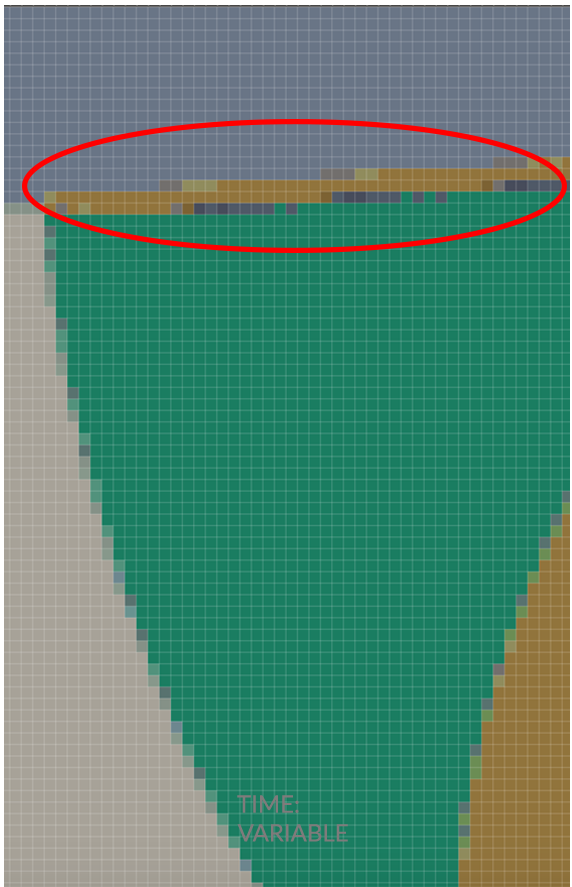
Here, we provide an example approach: in the below design, the Ochre area between the woman’s hat and her head contains unwanted pixelation. It should be either Viridian or Payne’s Grey, with no other colors mixed in, as there are in this image.
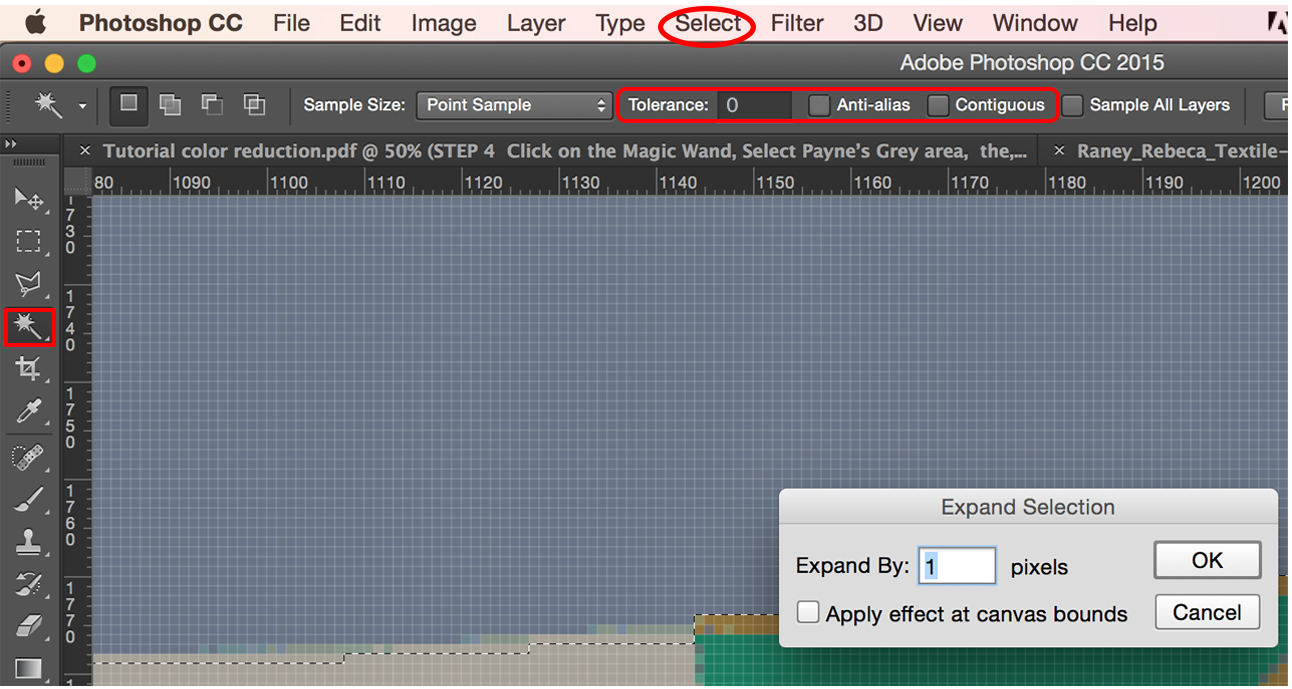
Step 4.
Click on the Magic Wand, select the color area you wish to edit. In this case, we select the Payne’s Grey area. Then go to Select > Modify > Expand.
In the Expand Selection box, type 1 px, and hit OK. Set the Tolerance to 0, with the “Anti-alias” and “Contiguous” options unchecked.
Step 5.
Select the correct color (in this case, Payne’s Grey) with the Eyedropper tool. Then select the paintbrush tool and paint in the selected areas with the correct color.

Step 6.
Now repeat steps 4 and 5 for all areas with unwanted extra colors. Fill in each area with the correct color.
In this example, for the Viridian area (woman’s head), we will show a slightly different approach: repeat step 4. With the Viridian area selected (and now expanded by 1 pixel), click on the Eye dropper tool and select the Viridian color swatch. Lastly, go to Edit > Fill > Use Foreground Color. Click OK. This will create the same desired effect as using the paintbrush tool.

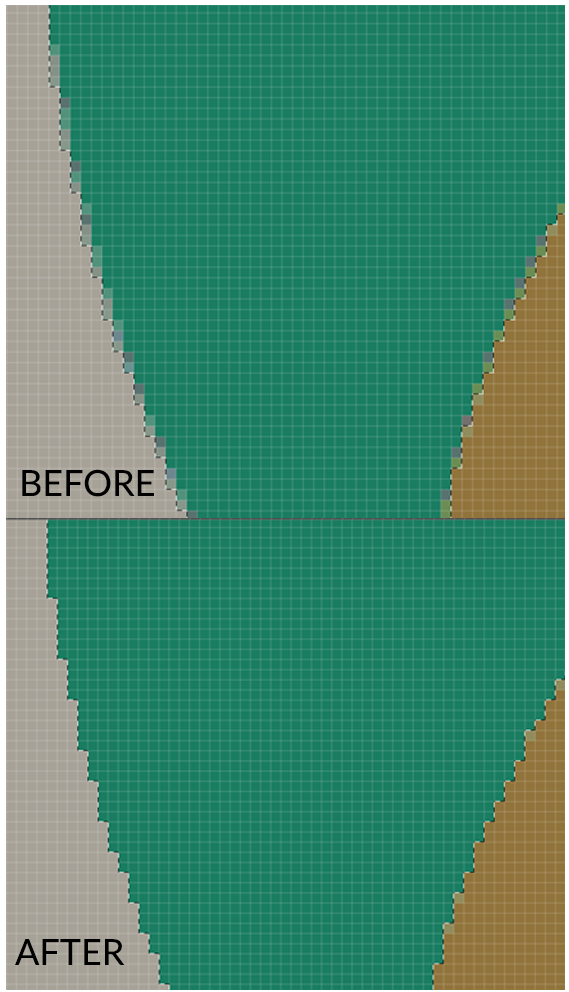
Step 7.
The once incorrectly colored curved edge should be filled with the correct (in this case, Viridian) color.
Note that “stair stepping” of pixels (the edges looking jagged) is normal and unavoidable in Photoshop. It will not greatly affect the look of the finished woven fabric. To see your design as it will appear woven, zoom out to
100%.
Step 8.
Keep cleaning all stray, incorrectly colored pixels in your design until there are none remaining. This process can be time consuming if there are many details in your design, but a thorough cleaning makes for a better quality woven product.
When you are finished, save your file as a PNG, and you should be ready to upload to the WOVNS platform.