
Step 1.
Most gradients in designs feature a solid transition from one color to another, with hundreds of colors in between that gradually shift into one another to create a smooth gradient.
When creating a fabric design, you are limited to the colors in your chosen color palette. Therefore, gradients cannot be used with a smooth transition, because the design would feature hundreds of shades of colors that are not part of the color palette.
Below is an example of a basic gradient. Although it may look like only two colors, it’s actually hundreds of different shades.
This tutorial will show you how to create a gradient transition from one color to another using only colors from your color palette.

Step 2.
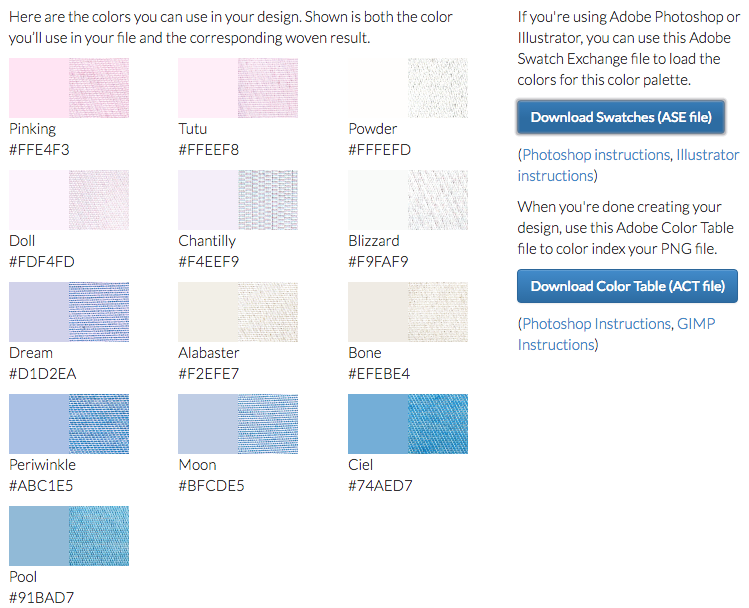
Select a WOVNS quality and color palette and load to your palettes menu in Photoshop. In this example, we are using the Pastel 17 Palette. See the Designing with Color Palettes in Photoshop tutorial if you are unsure of how to use color palettes.
Step 3.
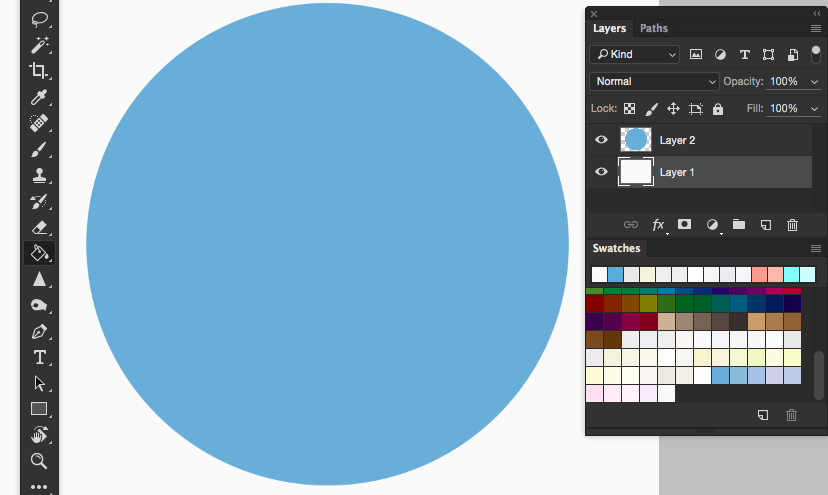
Start by selecting the colors you wish to use in your gradient from the color palette. In this example, the start of the gradient will be “Pinking”, and the end of the gradient will be “Ciel” from the Pastel 17 color palette.
Select the area of your design you wish to create a gradient in, and using the paint bucket or paintbrush tool, fill it with one of your gradient colors. In this case, we are using “Ciel’.
Step 4.
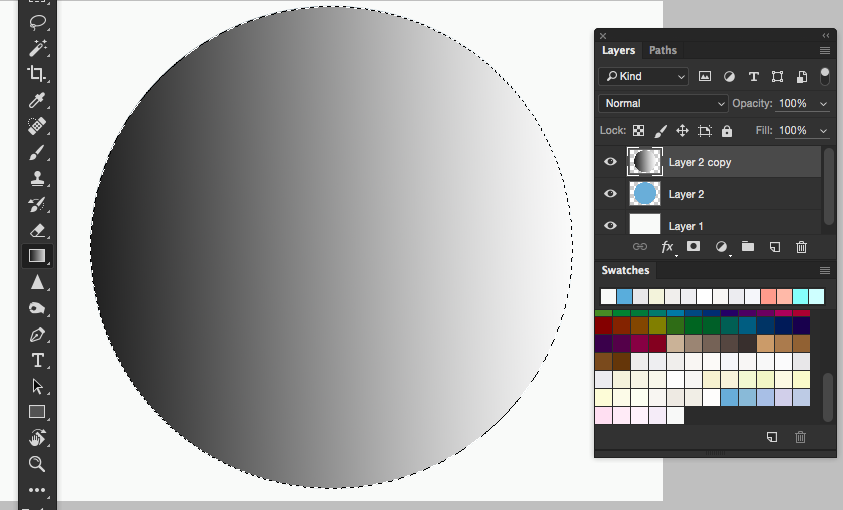
With your object still selected, make a copy on a new layer. Using the gradient tool, fill the object with a regular black to white, 100% opaque gradient.
Step 5.
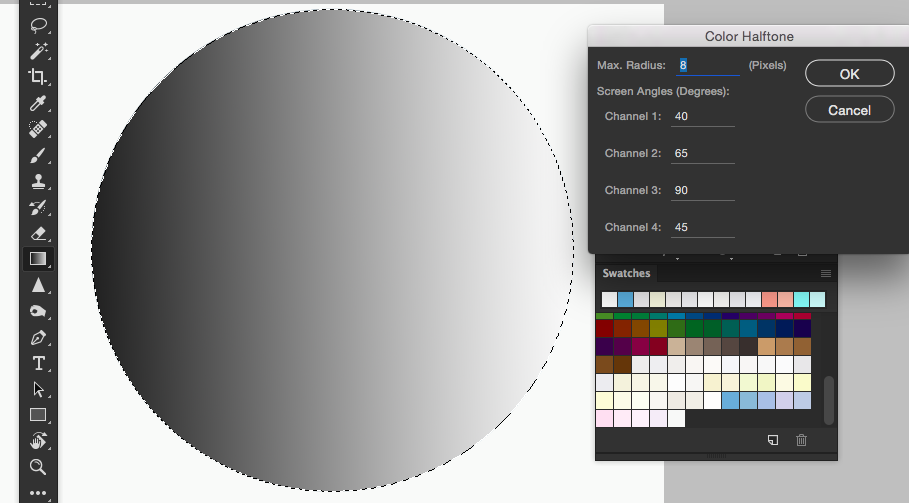
In the Photoshop menu, select Filter> Pixelate > Color Halftone. Input the size of the dots you’d like, as well as the channels. (Note: For our purposes, the channels won’t make much difference. Feel free to play with them to see the different effects you can get.) Hit OK.
Step 6.
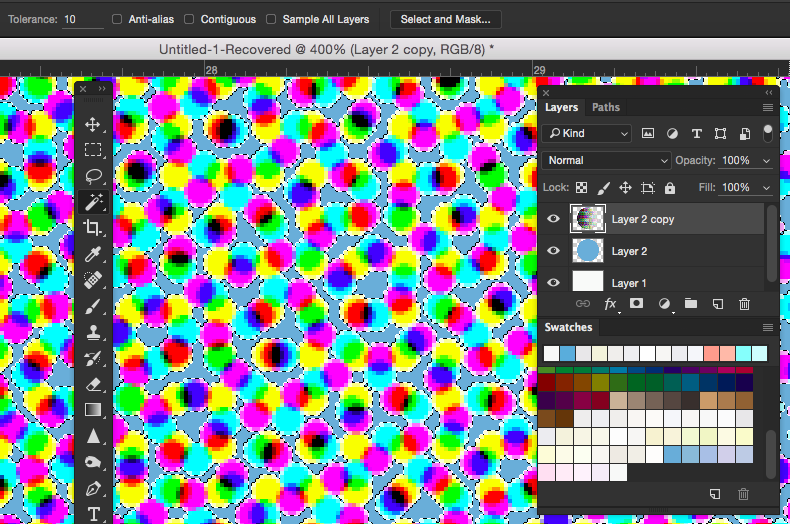
Select the white part of the halftoned gradient and hit delete. (Make sure you have the ‘contiguous’ and ‘anti-aliased’ options unchecked.) Now one half of your gradient shows through! In this case, the blue “Ciel” color from the layer below the one you are working on is visible.
Step 7.
Now hit Command-Shift-I (Mac) or Ctrl-Shift-I (PC) to select the inverse. Now your halftone dots are selected. Choose your second gradient color, and with the paintbrush tool, color in the entire selected area. In this case, we are using the “Crescent” color. Your selected color will replace the CMYK dots.
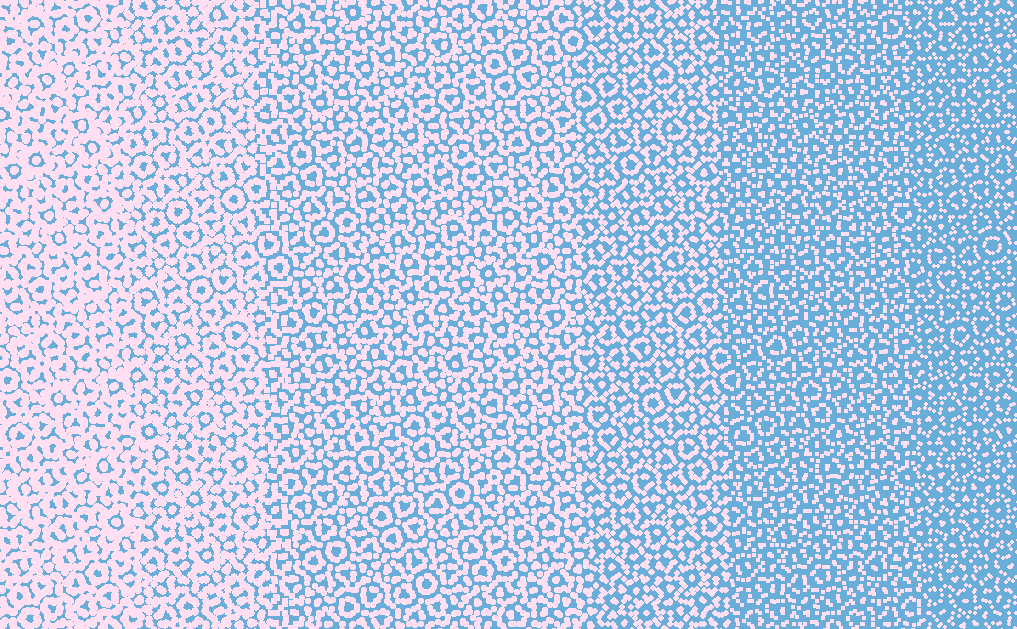
Step 8.
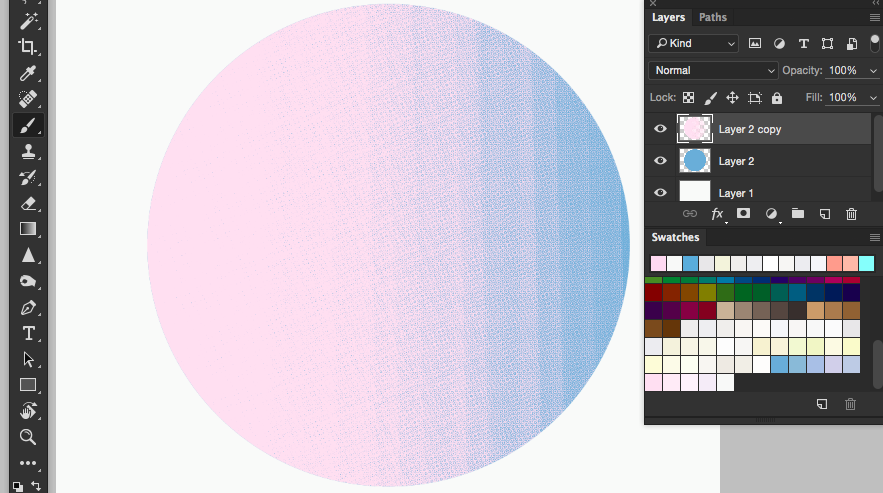
Your gradient is complete! Zoomed in, you can see that the dots clustered together in various densities mimic the different shades that make up a gradient, but still only use two colors, both which are from your selected palette.