Creating Repeats in Photoshop for Talma Quality Fabric

Requirements: Adobe Photoshop

Difficulty: Medium

Time: Variable
Step 1.
There are many different ways to create a seamless repeat. In this tutorial, we will show you one approach.
The video version of the following written tutorial is also available below.
Creating Repeats in Photoshop / Talma Quality – Tutorial from WOVNS on Vimeo.
Step 2.
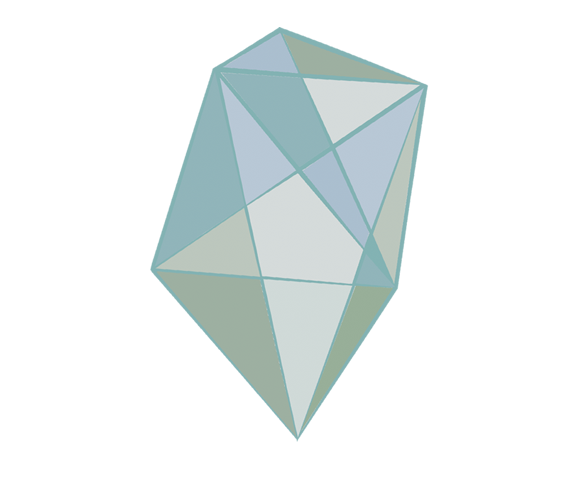
For this tutorial, we have previously drawn our motifs in Illustrator using a WOVNS color palette and have exported them as separate PNGs for repeat creation in Photoshop (see Designing with WOVNS Color Palettes in Illustrator). Ultimately, the program you choose to create both your motifs and repeat in is up to you, so long as it is finalized as an (*Indexed) PNG.
*Note: “Indexing” is an optional step that ensures only colors from a WOVNS palette exist in your finalized file, thereby preventing potential error messages upon upload.
Step 3.
Open a new file in Photoshop, adhering to the WOVNS File Specifications. For this tutorial, we are going to create a design that repeats multiple time across the width of the Talma quality fabric. To accomplish this, we are going to create a file that is a fraction of the final Talma quality specifications, and will nest evenly once repeated in the final file size requirements. This example uses the dimensions 498 pixels wide X 500 pixels high (498 x 8 = 3984 Talma width; 500 x 6 = 3000 Talma height).
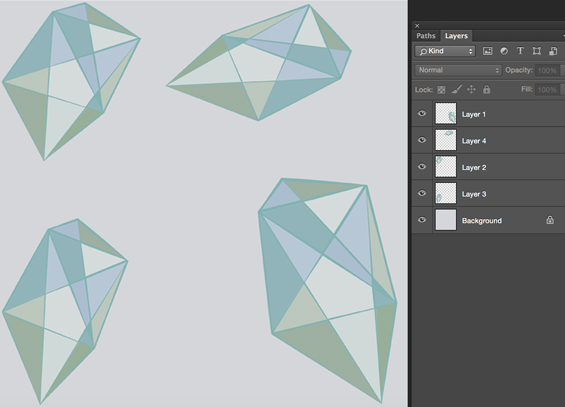
Once you have created your file, load the WOVNS color palette of your choice (see Designing with WOVNS Color Palettes in Photoshop tutorial). To paste your motifs into your new file, open your motif file(s), hit Select All (Control / Command A), and Copy (Control / Command C). Now toggle to your new file, and hit Paste (Control / Command P). Your motif(s) will be pasted onto new separate layers.
Play with scale and placement of your motifs, placing them close to the border but not crossing the border of your canvas. You will fill in the center of your design after Step 4.
Step 4.
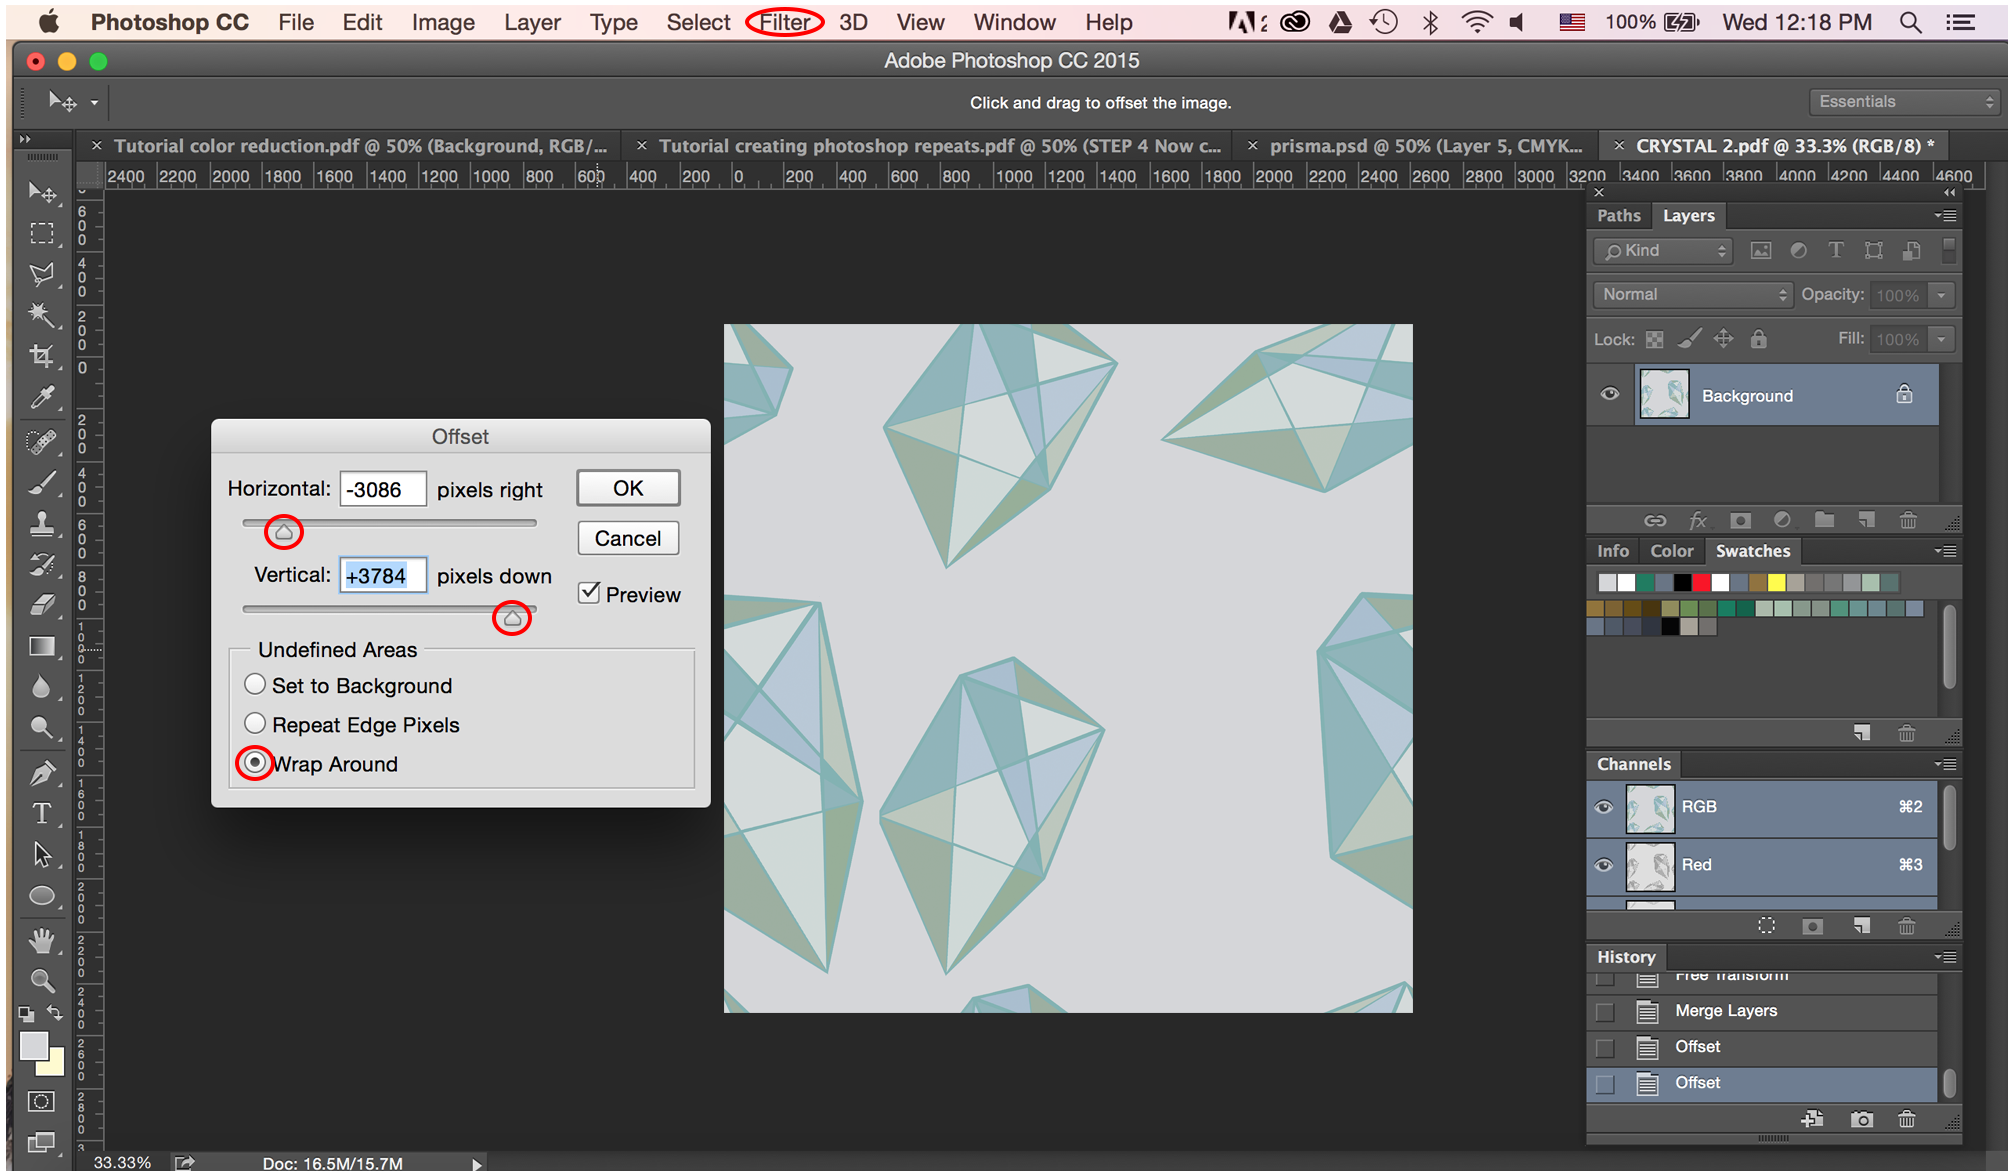
Flatten any existing layers by going to Layers > Flatten Image. Now, you are going to offset your design in order to resolve the edge condition of your tile and fill in the rest of your layout . Go to Filter > other > Offset. The Offset dialogue box will appear. Make sure Wrap Around is selected. Offset the motifs in your design by dividing the horizontal and vertical pixels by 2 and adjusting as needed. You should notice that your motifs are “wrapping around” the left and right, and top and bottom edges, with some empty space in the center of your design. When you are satisfied with the motif placement along the edges of your design, click OK.
Step 5.
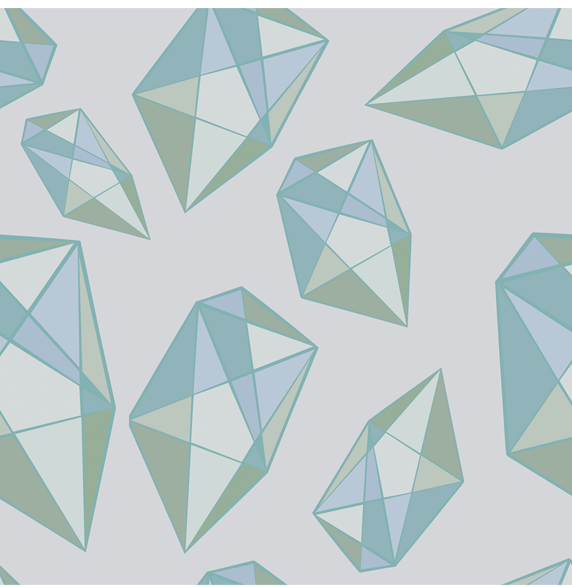
Now you are ready to fill in the center of your design with additional motifs. Again, you can play with scale and placement until you are satisfied with the overall layout. Save this file, in case you need to revise it moving forward.
Step 6.
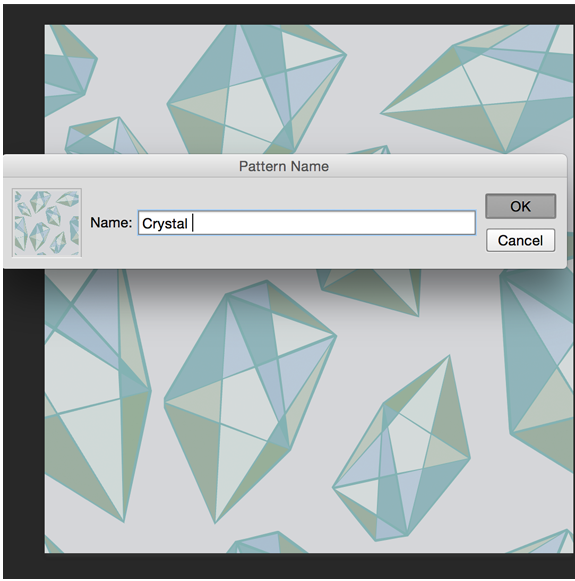
Evaluate if your design works as a repeating pattern. Select your tile (Control / Command A). Then, go to Edit > Define Pattern. Name your pattern and click OK.
Step 7.
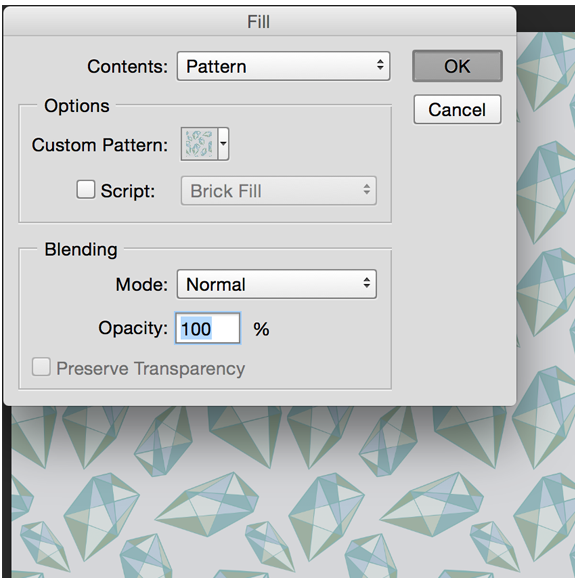
Open a new document that adheres to the Talma quality specifications (3984 x 3000 pixels). Go to Edit > Fill. Click on Custom Pattern. Find your new pattern and click OK.
Step 7.
If you are satisfied with how your design repeats, you are ready to finalize your file. Make sure your file follows WOVNS File Specifications, uses a WOVNS Color Palette (see Designing with WOVNS Color Palettes in Photoshop tutorial), and any unwanted pixelation is cleaned. Save your file as an Indexed PNG and you are ready to upload to WOVNS. Go to Submit Design on the WOVNS website, specify the quality and palette used, yardage amount, name it and submit.
